My Profile
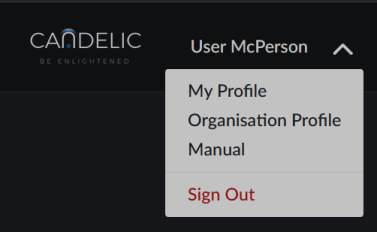
You can access the My Profile screen from anywhere in the ON Platform by clicking on your name in the top right corner of the screen.
Details
You can change the following details by clicking the edit button:
- First name
- Last name
- Phone number
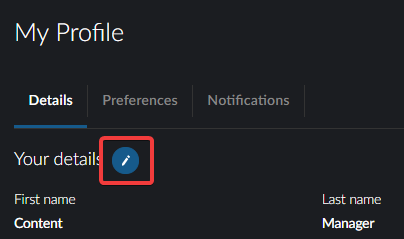
Request assistance from your company's Admin user if you need to change your access. Please note that email address and organisation can not be changed and the account must be recreated to change these details.
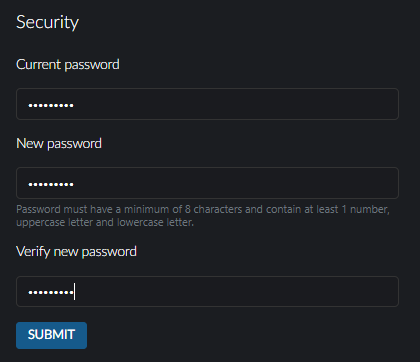
Change password
You can change your password under the Change password section. Enter your current password and then input the new password twice.
The new password must have a minimum of 8 characters and contain at least 1 number, an uppercase letter and a lowercase letter.
The submit button will only become active if the new passwords match.
Multi-factor authentication
Multi-factor authentication improves security for your account. Here are some recommended authenticator apps:
Google Authenticator
Download Google Authenticator, or alternatively search for "Google Authenticator" on the App Store or Google Play.
Microsoft Authenticator
Download Microsoft Authenticator, or alternatively search for "Microsoft Authenticator" on the App Store or Google Play.
Once you have an authenticator app installed on your device, simply scan the QR code shown on screen. This will add a new entry for ON. You can then enter the 6-digit verification code from your authenticator app to finish setting up multi-factor authentication for your account.
tip
When logging into ON, you can optionally tick "remember this device" to skip the prompt for a verification code on subsequent logins for your device.
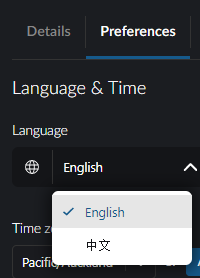
Preferences
Preferences will be stored in your browser's local storage. If you access the ON Platform with a different browser, you will need to change your preferences in that browser to see the changes.
Language
The ON platform is available in English and Simplified Chinese. Click your preferred language in the drop down if you wish to change your language.
Time and Date Settings
The time zone selected for your account will set the reporting times used throughout the system. If the time zone is not correct, you can edit it by selecting your time zone from the dropdown menu. Clicking the Auto Detect button will set your time zone for you.

Using the dropdown menus, you can select whether you prefer to use the 12-hour or 24-hour time format and also specify the date format that is used.


Notifications
A user can choose to receive email notifications advising if there is a screen outage or a new visual fault. To sign up, tick the Email checkbox on the appropriate line(s) and click the Save button.
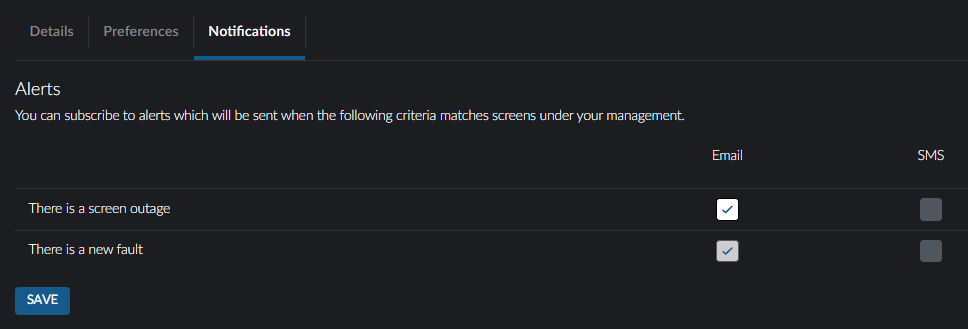
If you wish to activate or deactivate SMS notifications, please contact Candelic.